Showing posts with label Fashion. Show all posts

Tuesday, May 3, 2011

Earring Tutorial - Turquoise Beads

This past weekend I made a new pair of turquoise earrings from a necklace that I made several years ago...and NEVER actually wore.


 Would you like to learn how to make a pair? Read on!


You Will Need

Beads (you choose the color)
Beading Pliers
Earring Hooks
Beading Wire
Crimp Beads
Metal Loops (IDK what these are actually called but you'll see what I mean)

Here is the necklace...


I wanted to reuse all of those beautiful beads so I just snipped it with a pair of these...

Beading Pliers
...and then I started my project.

Step #1
Straiten/flatten the loop on your earring hook so that you can remove the existing bead(s) and add one of your "new" beads.


Step #2
Using the flat part of your pliers, bend the wire backwards and then, using the round part of your pliers, recreate a loop at the base of the earring hook.


Step #3
Take the metal loop and link it to the earring loop (you will have to open it slightly and then clamp it back together so that there is no space/gap. If you leave a space/gap then your link will easily break causing your earrings to fall apart).

Metal Loop


Step #4
String colorful beads of your choice onto the beading wire (this may look thick but it actually very thin and very flexible and easy to work with). I used 5 beads for the inner loop and 9 beads for the outer loop (depending on the size of beads that you are using you may want to use more or less).
Note: You can find beading wire at most craft stores and sometimes at Wal-Mart.


Step #5
Take your crimp bead and string all (4) of the wire ends through it.
Note: You can find crimp beads at most craft stores and sometimes at Wal-Mart.

Crimp Bead


Step #6
Now string all (4) of the wire ends through the metal loop, bend them around the loop and back through the crimp bead.
Tip: When stringing them through the crimp bead for the second time, it helps to push each wire through separately rather than all at once...it's a bit of a tight fit.


Step #7
Using the flat part of your pliers, squeeze the crimp bead flat over all the wires.


Step #8
Cut off all of the loose ends as close to the crimp bead as possible.
Tip: I have found that you can get a closer cut with a sharp pair of scissors than the wire cutter on the pliers.


Taa Daa!!!


 I just love the way they turned out and will be wearing them all Spring and Summer! I am planning to use the leftover beads to make a matching, double strand bracelet. 


Don't you think these would make a fabulous gift?


Happy jewelery making!


Friday, April 1, 2011

Little "Orange You Glad" Dress

Knock Knock! Who's there?


...It all started last week...


Once upon a time, this showed up at my door...(well it was sent to me in a box from my lovely SIL...two packages, to be exact, of lightly used baby girl clothing for the little lady of the house(!))...


I have always had quite an affinity for the color orange (such a bright, happy, cheerful color). In fact, it used to be my favorite color back in my HS days...

Well, I loved the colors in this dress but thought it could use a little sprucing up...

So I snipped off those bows, added a little fabric here and there, and Viola!


 Snip, sew, Viola!


Do you recognize this little flower?


I think I just might add another bum ruffle or two...because I'm obsessed. What do you think? Add/leave it?


Now, orange you glad you got to see this cheery little dress?


"And why are you anxious about clothing? Consider the lilies of the field, how they grow, they neither toil nor spin; yet I tell you, even Solomon in all his glory was not arrayed like one of these."
Matt. 6:18-29


Tuesday, March 29, 2011

Spring Inspired Fabric Flower Tutorial #2

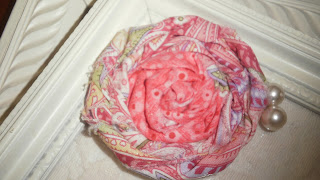
I call this flower technique the "ring around the rosie". It is so easy and fast and I just love the way the flowers turn out. I think these would look just lovely on a barrette/headband or pinned to a dress/shirt/cardigan.

Here are the first three flowers that I made of this variety. I had a lot of fun experimenting with different fabrics and textures.

100% cotton


black satin and lace with bird pin ornament


tan silk with glass pearl ornaments


If you missed #1 and would like to see it click here


On to number two!


You Will Need:

Hot Glue Gun
2-4 12in strips of fabric
Felt


Step 1
Choose your fabric. You can choose one single color or several different colors. You can also choose one single texture (such as cotton), or a variety of textures (satin, lace, linen, silk, polyester, etc.)

Step 2
Snip the ends of the fabric and tear it into strips.


 Note: some fabrics will not tear so you'll just have to experiment and cut strips for those that don't.

This creates a nice tattered edge to you fabric and adds detail.


You will only need a couple of 12 in strips to make one flower.

Step 3
Create a felt base for you flower (Tip: I try to ere on the side of making this too big rather than too small because you can always cut off the excess but you can't add to the base once you've started)

Step 4
Tie a knot in the end of your first strip. (Note: if you are going to add a pin or beads to the center than skip this step)


Step 5
Hot glue the knot or the end of your fabric to the center of the felt base.

Step 6
"Ring Around the Rosie" anyone??? Twist the fabric and glue it to the base while winding it round and round the knot until you reach the end of the first strip.


Step 7
Add the next strip and continue to twist, glue, and wind until you reach the end.


Step 8
Tuck the end between the base and the flower and glue.


Just look at that perfect rosie posie!

Have a great day!


Monday, March 28, 2011

Spring Inspired Fabric Flower Tutorial #1

Over the past several months I have been seeing fabric flowers popping up all over the place! I've seen them on pins, headbands, barrettes, dresses, purses, necklaces, and on so many other things. I love them! And the other day as I was coveting admiring one, I thought to myself, "I bet I could figure out how to make one of those". So here is my attempt at making a fabric flower...


I think it turned out quite well.

Would you like to learn how to make one? Yes? Read on!


You Will Need:

Thin Piece of Cardboard
Pencil
2 Round Objects (you choose the sizes) 
Scissors
Fabric
Hot Glue/Tacky Glue/Thread and Needle (you choose!)


Step 1. 
Make a flower pattern using a thin piece of cardboard (I just used a snack box) and 2 round objects (you'll need one larger object (I used a bowl), and one smaller object (I used a Quarter)). You can use just about anything for these, but do keep in mind that your flower's circumference will turn out just a bit larger than the "large" object that you choose.

 
The large object will create the "shape" for your pattern.
The small object will create the outline for the flower petals.


This is your finished flower pattern.

Step 2.
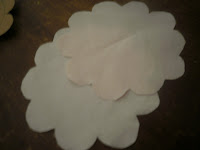
Use your pattern to outline ten (10) separate flower shapes onto your fabric and cut out each shape.


Step 3.
Create your flower's "base" by cutting out a medium sized circle from you fabric.

Sorry! I have no idea what happened to my lighting from here on out!

Step 4. 
One at a time, fold each flower shape in half and then in half again. Create your flower's first layer of petals by gluing (or sewing) five (5) separate (folded) shapes to the circular "base". 


Glue the 2nd "half" of each flower shape together as you go.


Step 5. 
Create your flower's second layer of petals by gluing (sewing) four (4) folded flower shapes to the center of the first layer of petals.


Can you see how full this flower is beginning to look?!

Step 6.
With your last flower shape fold the flower in half and then in thirds (glue) and then in half again (glue) to create a little rosette for the flower's center. Glue the rosette to the center of your flower.


 Step 7.
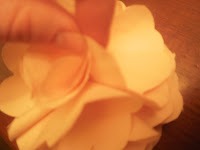
"Fluff" your flower by gluing the petals up/to each other here and there.


Step 8.
Voila! Step back and admire those pretty petals.


What a fabulous flower!


Later this week I'll show you how to make more Spring inspired fabric flowers.


Next up I'll introduce a technique that I call "Ring Around the Rosie". This is a no sew flower that is so simple and it turns out lovely every single time! Stay tuned!