Showing posts with label Sewing. Show all posts

Thursday, May 5, 2011

Mother's Day Gift Idea #1 - Bath Salts/Potpourri Sachet Tutorial

This Saturday I am going out with several other young mothers for an early Mother's Day luncheon. I wanted to make some sort of appreciation gift for each mother and came up with this...


It is a handmade sachet filled with bath salts (after all, we could all use a nice, relaxing, hot bath every once in awhile).

Note: You could use potpourri rather than bath salts if you wish for an equally nice gift.

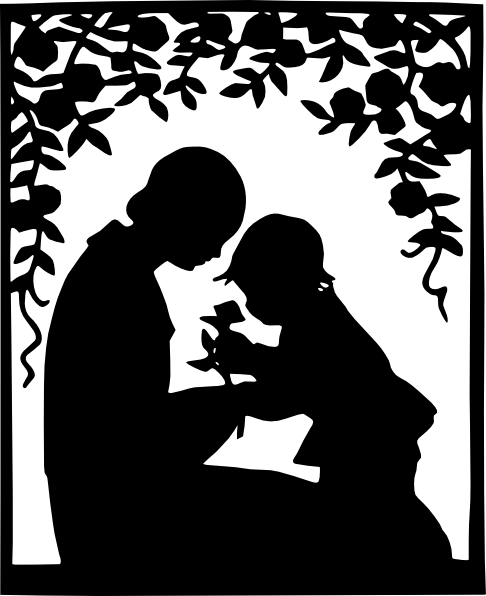
I will attach a little card to each sachet with this picture on the front:


 ...a short personal note of appreciation and this quote on the inside:  
"A mother is the most important person on earth. She cannot claim the honor of having built Notre Dame Cathedral. She need not. She has built something more magnificent than any Cathedral -- a dwelling for an immortal soul, the tiny perfection of her baby's body." -- Joseph Cardinal Mindszenty 

...and directions for use on the back.


The inspiration for the little pouch came from this Brighton Jewelery pouch that I had laying around...


In order to make one of these little pouches,
you will need:

4 & 3/4 in. x 14 & 1/4 in. Piece of Fabric
2 x 20 in. Pieces of Ribbon
Thread (matching)
Needle/Sewing Machine
Safety Pin
Strait Pins
Scissors
Note: 1/2 yd. of fabric makes 10-11 pouches


Step#1
Cut the fabric and  ribbons to the correct size/length.

Note: I made 11 pouches so I cut all of my fabric and ribbons right away.


Step #2
Measure 2.5 in. down the length of the fabric on the top and the bottom (i.e. down from the top and up from the bottom at all four corners), mark with a pencil, and snip 1/4 inch in.


Step #3
Fold the side of fabric over, then down, and pin.
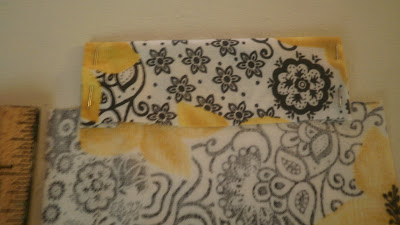


Fold it down 1/4 inch past the slit.


Step #4
Using a small stitch (I use "2" on my machine) sew over the flap using a 1/2 inch seam allowance.


Step#5
Sew over the flap again using a 1 inch seam allowance (or 1/2 inch in from the last line of stitching).


Step #6 
Sew both sides of the pouch using a 1/4 inch seam allowance and turn the pouch right-side out.


Step #7
Take a piece of ribbon, fold it back an inch or so, and put a safety pin through it. Now, slide it through the hole on one side of the fabric then turn it around and slide it through the hole on the other side of the fabric.


Step #8
Using the second strand of ribbon, repeat Step 7 from the opposite end.


FYI...


Since you're all dying to know...my nail color is "cute as a button" by essie ; )


Step #9
Measure 1/2-1 cup bath salt into a baggie/individual baggies.


Don't say a word! I am well aware that this looks highly illegal...but it is bath salt...I promise.


Step #10
Place the baggie(s) into the pouch(s), pull ribbons, and tie them in a bow!


So, would you like to know how much this project cost?

The fabric was $1.16, the ribbon was 45 cents/spool, and I already had the bath salts on hand (bath salts vary in cost...some are very inexpensive while others cost $$$) . The entire cost came to $2.06 + tax...which is approximately 20 cents per sachet!

Have a lovely Mother's Day!!!

Friday, April 1, 2011

Little "Orange You Glad" Dress

Knock Knock! Who's there?


...It all started last week...


Once upon a time, this showed up at my door...(well it was sent to me in a box from my lovely SIL...two packages, to be exact, of lightly used baby girl clothing for the little lady of the house(!))...


I have always had quite an affinity for the color orange (such a bright, happy, cheerful color). In fact, it used to be my favorite color back in my HS days...

Well, I loved the colors in this dress but thought it could use a little sprucing up...

So I snipped off those bows, added a little fabric here and there, and Viola!


 Snip, sew, Viola!


Do you recognize this little flower?


I think I just might add another bum ruffle or two...because I'm obsessed. What do you think? Add/leave it?


Now, orange you glad you got to see this cheery little dress?


"And why are you anxious about clothing? Consider the lilies of the field, how they grow, they neither toil nor spin; yet I tell you, even Solomon in all his glory was not arrayed like one of these."
Matt. 6:18-29


Tuesday, March 29, 2011

Spring Inspired Fabric Flower Tutorial #2

I call this flower technique the "ring around the rosie". It is so easy and fast and I just love the way the flowers turn out. I think these would look just lovely on a barrette/headband or pinned to a dress/shirt/cardigan.

Here are the first three flowers that I made of this variety. I had a lot of fun experimenting with different fabrics and textures.

100% cotton


black satin and lace with bird pin ornament


tan silk with glass pearl ornaments


If you missed #1 and would like to see it click here


On to number two!


You Will Need:

Hot Glue Gun
2-4 12in strips of fabric
Felt


Step 1
Choose your fabric. You can choose one single color or several different colors. You can also choose one single texture (such as cotton), or a variety of textures (satin, lace, linen, silk, polyester, etc.)

Step 2
Snip the ends of the fabric and tear it into strips.


 Note: some fabrics will not tear so you'll just have to experiment and cut strips for those that don't.

This creates a nice tattered edge to you fabric and adds detail.


You will only need a couple of 12 in strips to make one flower.

Step 3
Create a felt base for you flower (Tip: I try to ere on the side of making this too big rather than too small because you can always cut off the excess but you can't add to the base once you've started)

Step 4
Tie a knot in the end of your first strip. (Note: if you are going to add a pin or beads to the center than skip this step)


Step 5
Hot glue the knot or the end of your fabric to the center of the felt base.

Step 6
"Ring Around the Rosie" anyone??? Twist the fabric and glue it to the base while winding it round and round the knot until you reach the end of the first strip.


Step 7
Add the next strip and continue to twist, glue, and wind until you reach the end.


Step 8
Tuck the end between the base and the flower and glue.


Just look at that perfect rosie posie!

Have a great day!


Monday, March 28, 2011

Spring Inspired Fabric Flower Tutorial #1

Over the past several months I have been seeing fabric flowers popping up all over the place! I've seen them on pins, headbands, barrettes, dresses, purses, necklaces, and on so many other things. I love them! And the other day as I was coveting admiring one, I thought to myself, "I bet I could figure out how to make one of those". So here is my attempt at making a fabric flower...


I think it turned out quite well.

Would you like to learn how to make one? Yes? Read on!


You Will Need:

Thin Piece of Cardboard
Pencil
2 Round Objects (you choose the sizes) 
Scissors
Fabric
Hot Glue/Tacky Glue/Thread and Needle (you choose!)


Step 1. 
Make a flower pattern using a thin piece of cardboard (I just used a snack box) and 2 round objects (you'll need one larger object (I used a bowl), and one smaller object (I used a Quarter)). You can use just about anything for these, but do keep in mind that your flower's circumference will turn out just a bit larger than the "large" object that you choose.

 
The large object will create the "shape" for your pattern.
The small object will create the outline for the flower petals.


This is your finished flower pattern.

Step 2.
Use your pattern to outline ten (10) separate flower shapes onto your fabric and cut out each shape.


Step 3.
Create your flower's "base" by cutting out a medium sized circle from you fabric.

Sorry! I have no idea what happened to my lighting from here on out!

Step 4. 
One at a time, fold each flower shape in half and then in half again. Create your flower's first layer of petals by gluing (or sewing) five (5) separate (folded) shapes to the circular "base". 


Glue the 2nd "half" of each flower shape together as you go.


Step 5. 
Create your flower's second layer of petals by gluing (sewing) four (4) folded flower shapes to the center of the first layer of petals.


Can you see how full this flower is beginning to look?!

Step 6.
With your last flower shape fold the flower in half and then in thirds (glue) and then in half again (glue) to create a little rosette for the flower's center. Glue the rosette to the center of your flower.


 Step 7.
"Fluff" your flower by gluing the petals up/to each other here and there.


Step 8.
Voila! Step back and admire those pretty petals.


What a fabulous flower!


Later this week I'll show you how to make more Spring inspired fabric flowers.


Next up I'll introduce a technique that I call "Ring Around the Rosie". This is a no sew flower that is so simple and it turns out lovely every single time! Stay tuned!